Time to get that instant summer feeling with our new sundress Lea!
Sundress Lea has a V-shaped neckline finished with a trim, gently gathered shoulders and three gathered skirt ruffles that give her a swirly, bohemian look. The elastic in the back makes sure the dress fits well. Lea is a sleeveless pattern, but you can add a little sleeve ruffle if you like.
Let's do this!
Doublefold the neckline trim lengthwise, wrong sides of the fabric together and press.
Pin the long, unfinished side of the neckline trim to the front, right sides together, and stitch all layers together. Do the same for the other front. Finish all seams together with an overlock or by zigzagging. Press the seam allowances towards the front.
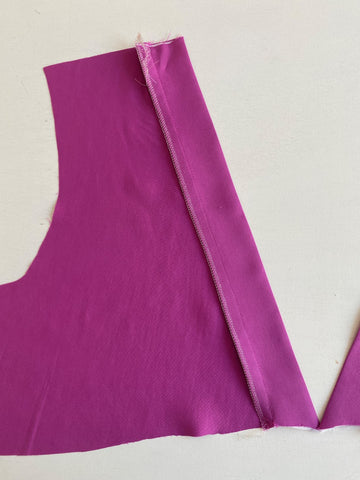
Use a chalk to mark the 1,5 cm seam allowance of the right front, at the bottom of the neckline trim and parallel to the seam. Pin right front on left front, with the wrong side of the right front on the right side of the left front. Work on the right side of the fabric. Make sure the neckline trim of the right front, at the height of the chalk line, is aligned to the seam of neckline trim and front of the left front. Stitch the neckline trims together at 1 cm parallel to the bottom edge.

Fold one long side of the back bias tape 1 cm to the wrong side and press. Now fold the other long side over the first one so you have one long ribbon of 1 cm wide. Press.

Open the back bias tape again and pin one long side to the neckline of the back, right sides of the fabric together. Stitch in place at 1 cm (this is in one of the pressed fold lines). If your bias tape surpasses your shoulder seam, it probably got stretched a bit when ironing. Cut the excess fabric.


Press the seam allowances towards the back bias tape and stitch just next to the edge, through all layers. Cut the seam allowance carefully.


Gather the shoulder seams of the front (not the neckline trims). Easestitch using the largest stitch on your sewing machine at 1 cm from the edge. Easestitch a second time at 0,5 cm.

Pin the shoulder seams of front and back, right sides of the fabric together. Gather the fabric of the front evenly so it fits the back. Fold the end of the bias tape over the shoulder seam and fold the pressed seam of the biais tape back in place.


Stitch the shoulder seam through all layers and finish the seams together with an overlock or by zigzagging. Remove your gathering threads.

Fold the bias tape towards the inside of the back and stitch just next to the open edge.

Finish the side seams of front and back with an overlock or by zigzagging. Pin the side seams, right sides of the fabric together and stitch. Press open.
If you want to make the dress without the sleeve ruffle, skip the next 2 steps.
Press the long, rounded side of the sleeve ruffle 1 cm to the wrong side and stitch right next to the fold line. Trim the seam allowance until your stitching line and fold another 0,5 cm to the wrong side. Make sure to also fold the ends. Stitch in place.


Gather the unfinished side of the sleeve ruffle in the same way you gathered before.

Mark the front and back of the sleeve ruffle and pin to the armhole opening between the two markings, right sides of the fabric together. Make sure the markings of the shoulder match. Stitch in place at 1 cm of the edge.

Pin the short ends of the armhole bias tape with the right sides together and stitch. Press the seam open.

Press 1 cm of the side to the wrong side.

Pin the unpressed side of the bias tape to the armhole and sleeve ruffle. The right side of the bias tape is on the wrong side of the sleeve ruffle. Sitch in place all around.


Press the seam allowances towards the bias tape and stitch all around just next to your previous stitching.

Trim the seam allowances carefully.

Fold the bias tape to the wrong side of the dress and make sure that the pressed seam is on the inside. Stitch all around at approx. 5 to 7 mm of the edge. Work on the right side of the front. Press nicely.

Finish all side seams of the upper, middle and lower ruffles with an overlock or by zigzagging.

Pin the front upper ruffle to the back upper ruffle, right sides together and stitch the side seams. Press open.

Gather the top of the ruffle in the same way you did before.

Pin the upper ruffle to the front and back with the markings and side seams matching. Stitch in place and remove the gathering threads. Finish the seams together with an overlock or by zigzagging.

Repeat this to attach the middle ruffle to the upper ruffle and the lower ruffle to the middle ruffle.
Press the seam 1,5 cm to the wrong side. Then press another 1,5 cm to the wrong side and stitch all around.

Pin the elastic to the seam allowance of the back upper ruffle and the back, to test if the length fits you well. Adapt if necessary.
Stitch the elastic to the seam allowances of the back upper ruffle and the back, on the inside of the dress. Make sure to only stitch it to the seam allowances. Mark the center of the elastic and the back. Stitch one end of the elastic on the seam allowance of the side seam.

Stretch the elastic so the center marking of the elastic matches the center marking of the back. Pin in place and stitch the elastic to the seam allowance while stretching it. When you arrive at the center, pin the end of the elastic to the seam allowance of the other side seam. Stretch the elastic again and stitch it in place until the side seam.


Give your dress a nice press.